redo - application for quick alias creation
Redo1 is a tool for quick and easy alias creation from last invoked commands.
Check post about tool hstr, which also speed up work in terminal
Installation
Below script for installing 0.5.0 version. Before install, you should check newest version on GitHub: release redo.
1REDO_VERSION=0.5.0
2wget https://github.com/barthr/redo/releases/download/v${REDO_VERSION}/redo_${REDO_VERSION}_Linux_x86_64.tar.gz
3tar -xf redo_${REDO_VERSION}_Linux_x86_64.tar.gz redo
4sudo mv redo /usr/local/bin
5rm -rf redo_${REDO_VERSION}_Linux_x86_64.tar.gz redo
Unfortunately, variables are not exported by default in Ubuntu 20.04:
HISTFILEpointing on file with command historyEDITORpointing on text editor
In order for the tool to work properly, we can set the variables REDO_HISTORY_PATH and REDO_EDITOR
Below is the script that adds these variables to the file ~/.bashrc
1echo 'export REDO_HISTORY_PATH=$HISTFILE' >> ~/.bashrc
2echo 'export REDO_EDITOR=vim' >> ~/.bashrc
I also recommend changing the bash command history behavior to:
- each command was available in the file immediately after typing
.bash_history(normally only after the session ends) - see commands from different sessions (if you work on several at once)
1echo 'shopt -s histappend' >> ~/.bashrc
2echo 'export PROMPT_COMMAND="history -a; history -n; ${PROMPT_COMMAND}"' >> ~/.bashrc
You should also add loading a file with created aliases using this tool.
1echo 'source "$(redo alias-file)"' >> ~/.bashrc
Finally, the changes are read into the current terminal session.
1source ~/.bashrc
The complete installation script is available at GIST.
1curl https://gist.githubusercontent.com/speedlog/ae6c34cee56d758231560c64ac5f53e9/raw/28a4cf1e586e89ddc70aa4f8a96e4d489ad6ad2d/install_redo.sh | bash
Creating an alias with redo
To create an alias, type the redo command.
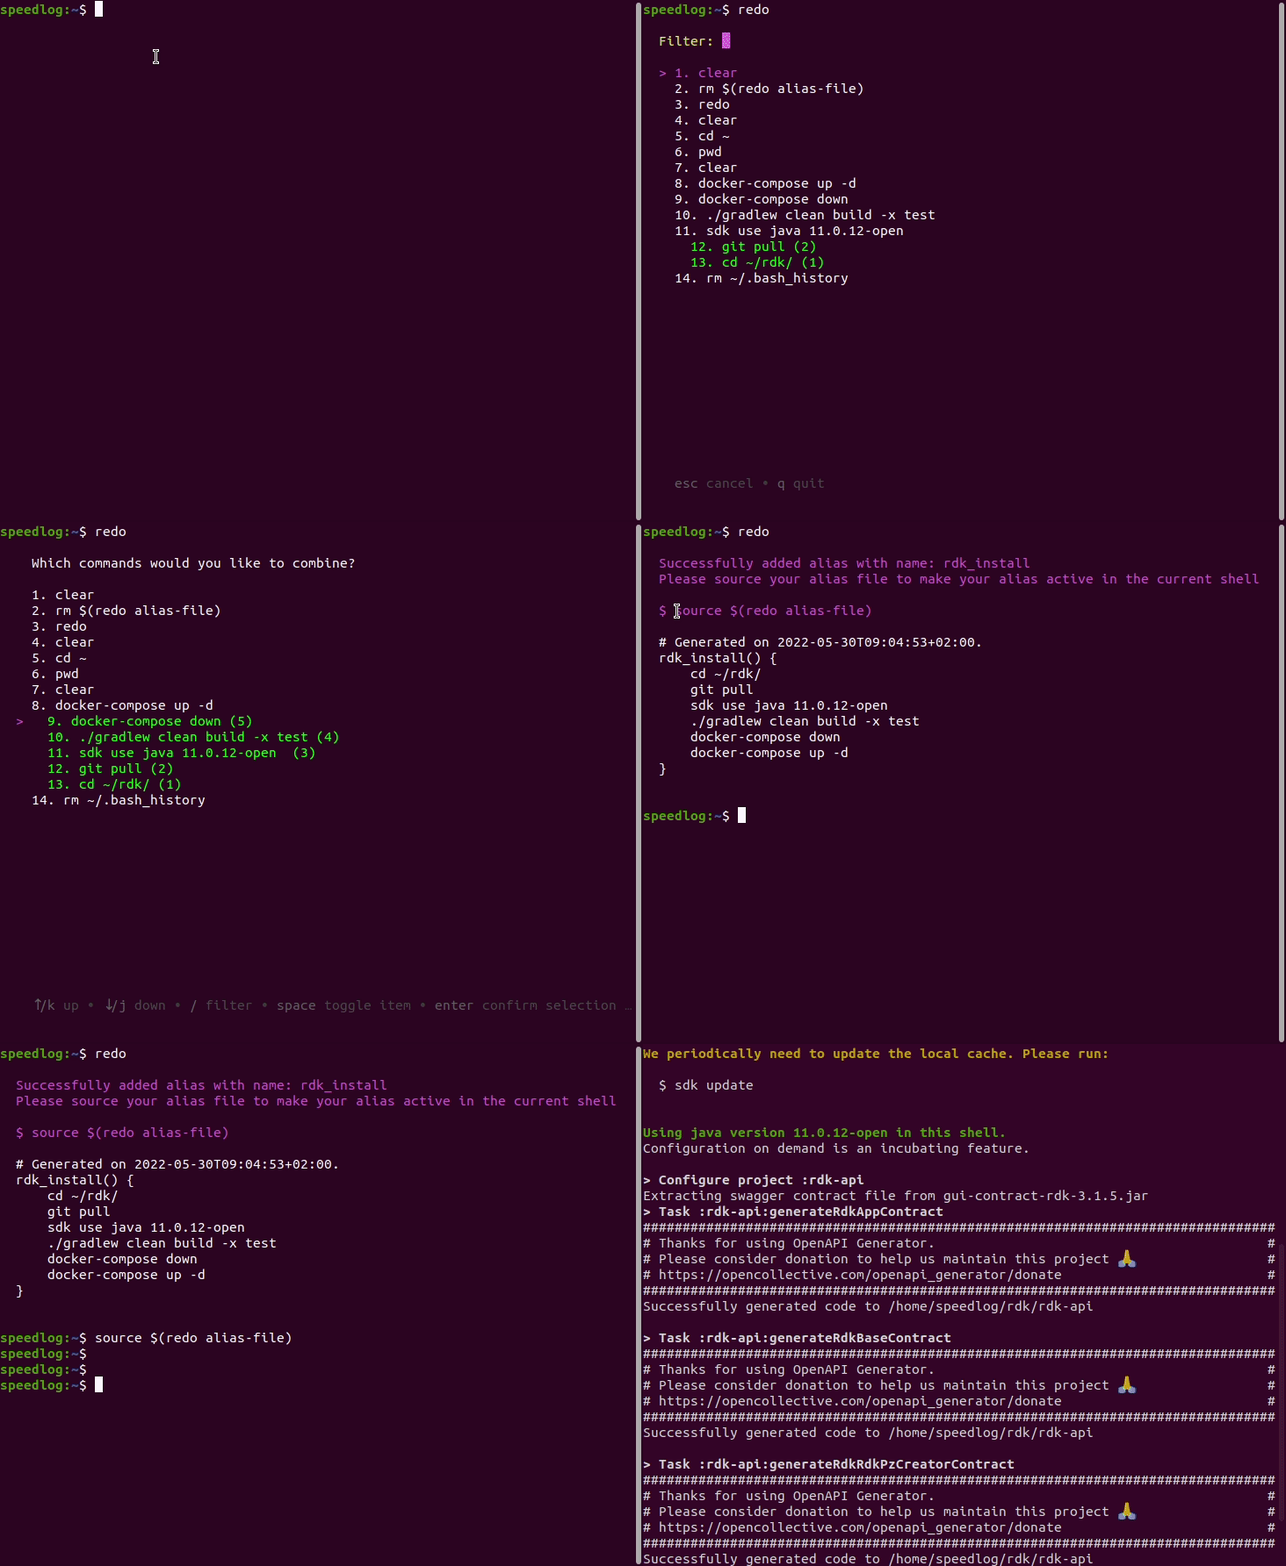
A list of recently run commands is shown.
We can browse the list using the up/down arrows.
We can also filter the history by pressing / and typing the piece of text we are looking for.
Commands that we want to add to the alias are marked with a space. The selection shows the order of running the command in the alias.
At the end click ENTER and enter the name you want to give to the alias.
Below is an animation with an example of creating an alias rdk_install in order to:
- switch to the project directory
- download the latest changes from the repository
- setting up with sdkman java version 11 (this command will be found using filtering)
- rebuild your project using gradle (this command will be found using filtering)
- rebuild environment with docker-compose

Running a created alias
The created aliases are located in a file whose name can be checked by running the command
1redo alias-file
After creating the alias, to be able to use it immediately you need to read the file
1source $(redo alias-file)
or open a new terminal.
Now all you need to do on the command line is use the alias name that was given during creation. In the above example it was run_rdk.